Google “highly recommend” setting this up, so if you are blogging regularly then you should be thinking about setting up Google Authorship too.
Why set up Google Authorship?
Google engineer Othar Hansson reports that Google Authorship is:
“a way to connect authors with their content on the web. We’re experimenting with using this data to help people find content from great authors in our search results.”
Putting aside any impact that setting up an authorship may or may not have on SEO, simply having an image show up in the Google search results is reported to increase your clickthrough rate. Google are really pushing the Google+ products at the moment, linking local search results to Google Plus business pages, so it makes sense that authors should be linked to their Google Plus profiles too. I have a feeling that all these factors are going to matter hugely when it comes to ranking in the near future. So why not set it up now and be ahead of the game?
It’s All About the Headshot!
First thing you need to do is set up a Google Plus profile. The most important thing here is your profile image. A clear and professional looking headshot is perfect. A mobile phone snap in your bathroom mirror is not. There is a thread over at Webmaster World in which the author experimented with headshots to see which worked best and he received a noticeable spike in clicks. He also notes that the changes take effect instantly within Googles search results pages.
Go Public
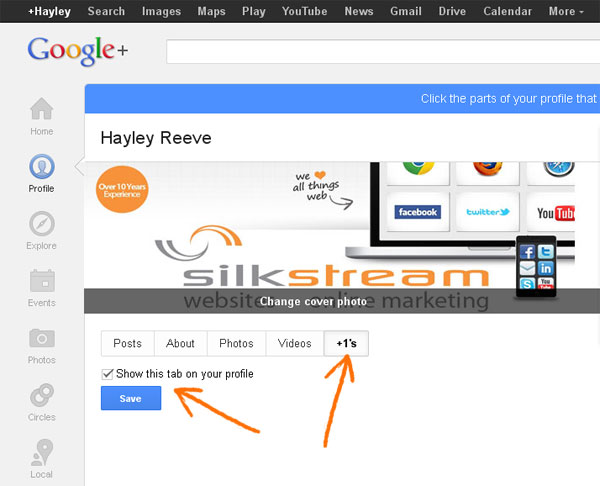
You also need to have all your posts within your Google Plus profile set to public. You can do this by going to the account page, then edit profile and then clicking the +1 tab and tick the box marked “show this tab on your profile”. Finally save this.
Link Your Sites
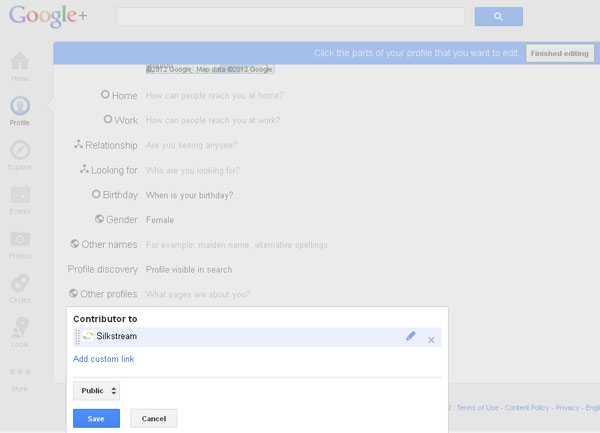
At the bottom of your profile editing screen you will notice that you can add “contributor to” links. Add your blog or blogs here and link to them as shown below.
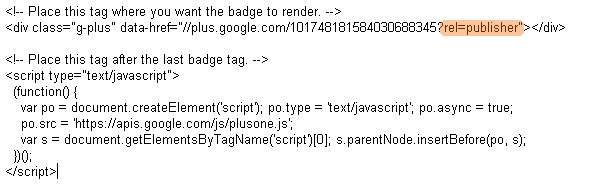
You should also add a Google Plus badge to your website. You can do this by visiting:
developers.google.com/+/plugins/badge/
The code should look something like as shown below. Note the “rel=publisher” part? This confirms to Google that your website is also the publisher of that Google+ Business Page. It is important that you place this code on your website somewhere that it will be visible on every page.
Next, you need to link your content to your Google Plus profile. This can be done in one of two ways.
1) If you have an email address hosted on the same domain such as “example@silkstream.net” you can visit this authorship page and claim authorship easily from here. If this is your chosen method of establishing authorship then it is very important to ensure that each article published clearly identifies yourself as the author, and that your byline name matches the name on your Google Plus profile.
2) Create a link from your webpage to your Google Plus profile. It should look like this:
<a href=”https://plus.google.com/104870844286687979752?rel=author”>Google</a>
It is important that this link is included on every new article you post and that the “rel=author” code is included.
Once you have completed these steps you should start to see your face appearing in the search results within a few weeks.
Nice Article i assign authorship for my blog thanx mate for an awesome article :)
Thanks for the article, it really helped me to signup for Google authorship.